Tuesday, December 28, 2010

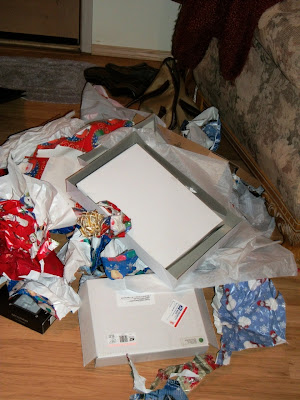
The Aftermath

Romeo and Jude got some catnip and toys in their stocking...

 Wanna play?

The kids got some clothes, electronics and other fun things


All that careful wrapping


Wipeout


Now to put it all away for another year


On Christmas eve I slipped coming down the stairs and fractured my elbow.  Typing with one hand so posts will be short. 

Happy organizing!!!

Thursday, December 23, 2010

Christmas Traditions

Our family has some traditions that we follow each year at Christmas time.  Many people have their own special things they do each year.  Here are some of our Holiday Traditions:

Each year, usually the day after Thanksgiving, we go up in the mountains and find and cut our Christmas tree. 


Trudging up the side of the mountain to look for the tree that was spotted from the road.


We decorate the tree the next day with all of our homemade and special  ornaments and a few extras if the tree is big.  Our oldest put the tree topper on for years so now that tradition has passed to the youngest child. 


We buy or make teacher gifts and wrap them up nice to deliver before Christmas break begins. This year we made coasters which was quite a challenge but turned out to be a great learning experience and cute gifts!  See the previous post for details!


We make cookies.  We always make cutouts with frosting and sprinkles, and sometimes Russian Tea cakes (also known as Mexican wedding cakes), and usually something new.  This year we used my mother in law's retro spritz cookie gun and make spritz cookies for the first time.  No pictures, we ate them already!  Still have to do the cutouts tomorrow!


We do something special on Christmas eve.  It could be going out to eat a nice meal, or going to a friends or having company over. 

The local park has a lights and caroling festival in early December that we attended this year.


The kids each open one gift on Christmas eve.  This one can NEVER be changed!  My son is currently trying to convince me that Christmas eve starts at 3pm!


We usually get in the car and drive around looking at the houses all decorated with lights.  There is one large neighborhood nearby that even has buses go through taking people! 


Christmas morning, we get up when the kids wake us up, come down in our pjs, light a fire, and take turns opening our gifts.  We start with our stockings. 

Christmas morning 2009

I take lots of pictures to scrapbook later.  I still have last years to get scrapped!  Oh no!  Life is getting ahead of me again! 

We make a nice dinner and get out the "good" dishes, candles, sparkling cider.  I think we are having a simple dinner this year.  We usually make ham. 

Christmas table 2009

Well, thats what we do at Christmas.  How about you?  I would love to hear what you do!

linked at http://trulylovelywiththelaneysisters.blogspot.com/

Tuesday, December 21, 2010

Easy Project Made Hard

It started out simple.  I was attempting to come up with some inexpensive teacher gifts.  Jared is in Junior high and these teachers  put up with a lot from students.  They deserve some recognition.  I didn't want to do the standard Starbucks coffee gift card this year.  He has six teachers.

I love to look at projects on other blogs and get ideas.  I found one that seemed simple and fool proof.  At least it worked for Stephanie.  See her cute project here:  Holiday Coasters Tutorial

I decided I wanted to simplify her idea and not try to cut out a stencil, or paint the tile.  My plan was to purchase some glazed white tiles, take some scrapbook paper, and then mod podge sets of four coasters for each teacher  plus some for a friend. 

My son wanted no part of the crafting.  He knows.  He has done projects with me before.  I sat him down and asked him about his teachers.  He has 4 male teachers this year.  Men don't usually even use coasters but I thought, if I made them specific to their interest, they may at least like them.  So, I pried some information out of my son about hobbies, interests, subjects taught etc for each teacher.  I convinced him to go with me to the scrapbook store and choose paper.  One liked old trucks.  No paper with trucks.  One was into competitive pistol shooting.  No paper with pistols or any type of gun.  One liked to run.  You guessed it.  Nothing!  No running shoes, no running. 


I should have stopped at this point.  Two hours later, with my son whining loudly we left the store with some alternatives.  Next was Home Depot for the tiles, and a roll of cork (self adhesive, I thought that would save time too).  I was going to buy felt but didn't want to make another stop. 


We went home and I gathered up supplies: 


I turned the 12 x 12 paper over and measured 4 inches across and down and then used my scrapbook cutter to cut the strips.  This will give you 9 squares (picture already has one strip cut off).  Somehow, even with measuring, mine didn't all come out the same size!  I know yours will.  Anyway, the tiles measure 4 and 1/4 inches so I made it 1/4 smaller to fit easily with no overhang. 


I laid out all the squares to figure out which 4  would look best. 


The brown tiles to the right were redone numerous times but I never could get all the wrinkles out so they didn't make it in the final group!  One of many experiements! 

I put a light coat of Mod Podge directly on the tile and then placed the paper on and smoothed it out.  I then put another coat of mod podge on top of the paper and waited for it to dry.  I got alot of wrinkles and air bubbles that I wasn't able to get out.  So I redid several coasters.  Good thing those papers yeilded 9 squares is all I can say!

I learned a couple of things:  use card stock.  How people can manage to do this with napkins is beyond me!  I could barely do it with regular paper!  Once you put the paper on and mod podge over it, you get air bubbles and wrinkles.  You can "work them out" with your finger, but the 'long' ones tend to turn into a hard 'line' wrinkle and then you are stuck.  If the paper gets dry or you rub too hard, you tear it.  Don't ask how I know this. 

Doesn't show very well but this one has really long set in wrinkles on the lower left
look closely by the word LOVE.  I took about 5 pictures and this is the best I got to show!


Second, to minimize the air bubbles, put your mod podge on the tile, lay the paper down and press it firmly all around the edges.  Let it dry for a few minutes BEFORE putting modpodge on the top of the paper!  While this doesn't eliminate wrinkles, it greatly reduces them!  Especially if you are using card stock! 

Third, Don't multi-layer!  It just doesn't work very well.  You can see this on the MATH coasters, where I put card stock, stickers and die cuts.  It is ok, but not smooth.

Fourth, Even if the coaster has set overnight, you can put it in a sink of hot water and dish soap and soak the paper off!  Try it again and again.  Why would you want to do this you ask?  hmmmm I just know that I did...
Once the mod podge has dried, spray them with a spray sealer!  This will help to seal them so they don't stick to the cup!  ha! 

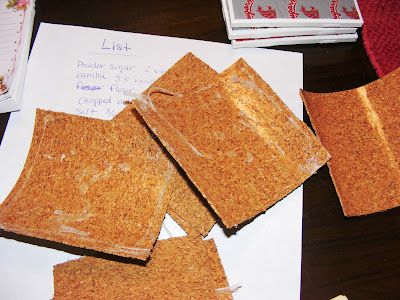
Purchase pre cut felt dots and stick them on!  Do not do the self adhesive cork, it doesn't work.  It will not stick even if you put hot glue on the self adhesive cork!  I guess this is because the bottom of the tile is uneven.  I was able to use small squares of cork on the corners and they stuck fine on SOME of the coasters.  For unknown reasons, for about 10 of these, I had to use super glue and the cork.  My fingers were glued together, to the glue tube, and to the cork by the time I was done!  Does this sound like fun yet? 


FAIL! 
pay no attention to the grocery list and the almond box. 
 My kids were making cookies at the same time to add to the fun! 


Lastly, Do NOT stack them, even if they have dried for an hour or so, wait at least 24 hours!  I did this, got up the next morning, and some of the tiles were 'wet' again!  aaarrrgggghhhh!!!

Once I redid some of these, got the cork or felt on the bottom, and sprayed the sealer, I got some ribbon and tied them up, and put them in gift bags with a cute ornament.  I dropped my son off in front of the school this morning with all 6 bags to deliver! 

Ready for the finished project? 

For the female PE teacher I went with a feminine look


For the male teacher who coaches college foothball on the side


I did two sets of these for 2 male teachers who are strong Washington State Cougar fans. 


For the male English teacher who likes to Scuba dive


For my girl friend


For the female Math Teacher


All ready to go in the gift bags~


So, makes you want to run out and get the supplies huh?  Actually I think they turned out pretty cute and I am sure you won't have the same trouble.  This would be nice to do just one or two sets but it was a mistake for me to wait until the last minute and then do 7 sets!  Live and learn right?  


Linking up at : Between Naps on the Porch - http://www.betweennapsontheporch.blogspot.com/
The DIY Showoff http://thediyshowoff.blogspot.com/
Tales from Bloggaritaville http://lbratina.blogspot.com/
Paisley Passions http://paisleypassions.blogspot.com/
Remodleholic http://www.remodelaholic.com/2010/12/remodelaholics-anonymous-51-blog-link.html

Thursday, December 16, 2010

Our Christmas Tree Tells a Story

I have always sorta wanted one of those beautiful Christmas trees you see in magazines where everything matches and it just looks so stunning.  Many of you also have gorgeous trees and you manage to incorporate both purchased and homemade ornaments and make it look great.  I have so many handmade ornaments that ours is always a mix of colors, styles, and patterns and ends up looking, well... like the tree I grew up with. 


We got the tree up in the mountains and despite cutting it again after we got home, it barely fits in the house!


We all have our favorite ornaments from years past.  There are the ones the kids have made, ceramic mice that I painted before we had children, wise men and nativity characters painted by a close friend, crocheted ornaments from my mother and grandmother.  There are old store bought ornaments from my childhood tree, and some which my husband and I bought back in 1975!  (thankfully, most of the straw people have moved on).  Each one tells a story and some are fun to make too.  I wanted to show you a glimpse of our lives through these ornaments and hopefully inspire you to create some (more) of your own memories.


The picture ornaments of my kids was started by their home daycare mom.  I will be forever thankful to her for doing this.  These have become so precious now that the kids are older! 

If you would like to start this tradition, these are really easy to make. Save up the tops of your frozen juice cans. Rinse them well and then simply cut a picture to fit, use ric rac or lace, glitter and a ribbon to hang and glue it on with a hot glue gun or even super glue! It is done in minutes but lasts a lifetime. It is so much fun that kids even like to make their own! These work as great gifts for kids to give to their grandparents too.


 My daughter at halloween age 8 and this year decorating the tree. 

 Add the name and date to the back on a piece of tape or a sticker

 My son as a baby

My daughter as a baby and my mom (my mom made this one and simply used ric rac
and put a hole in the lid to hang.

When my kids were 10 and 2 years I bought some clear glass ornaments and let them choose two colors of acrylic paint for each ornament.  Just remove the lid, let them squirt in some of each color paint, and then have them roll it around to coat the sides.  Turn it upside down to dry over night (an empty egg carton works well for this) and reattach the hanger.  These came out really nice and are suitable for young kids too.  Although, I think I would try for the acrylic or plastic ornaments rather than glass if I were you!  It was pretty stressful helping a 2 year old to hold it "lightly". 


It's even ok if it doesn't completely coat the glass! 

I used to paint ceramic ornaments and I even had the kids paint some of their own too.  These also go on the tree.  My favorites are the little mice. 


 My friend painted  the 3 wise men, Joseph, Mary and Jesus

 My mom painted  different colored teddy bears for the kids

 One of the better ones my daughter painted (she was a bit older when she did this one!)

 A santa I painted along with a few of the old "vintage" ornaments from our very first tree!


My favorite of the mice ornaments

 My grandmother crocheted these by using the round plastic pop can holders to crochet around.


My mom made a few sets of these for my sister, a friend and I.  She did a wreath, a bell, a star and the snowflake.  I think this one is my favorite.  So delicate. 

Here are a couple that were made at school or Christmas parties


This one is really old

Our Angel has to duck her head this year


I think the best part of having all these handmade ornaments is having something to remember the special times and people in our lives.  Both my mother and grandmother are gone now, but we think about them every year when we are decorating the tree.  These are ornaments that will definately be handed down in our family. 

Well, there is a little tour of our tree. What special ornaments do you put on your tree?

Linking up at Shabby Chic Cottage  http://www.theshabbychiccottage.net/
House of Hepworths http://www.houseofhepworths.com/
Remodelaholic http://www.remodelaholic.com/2010/12/remodelaholics-anonymous-50-blog-link.html

LinkWithin

Related Posts with Thumbnails